Recently Evil Hat Productions put together a pdf bundle deal featuring Spirit of the Century, a FateRPG-based pulp super game, and Diaspora, a FateRPG-based hard science fiction game. Here's the link to this cool deal.
I really like the ideas found in the FateRPG, even though they're not a good match up to my regular gaming group's tastes. Along with zero-centric FUDGE dice mechanics, the concept of Aspects has probably done more to change how I think about games in the last five years than anything else I've read. If you're at all curious about the FateRPG, this deal is a great way to see two implementations of the system. If you want to find out more about the FateRPG itself, there are free downloadable copies of FateRPG 2.0 and the Spirit of the Century SRD on the main FateRPG site.
If you're interested in print versions of either game, they're a bit more costly, but you can get Diaspora here via Lulu, and Spirit of the Century here via Evil Hat's storefront.
PBE Games on DriveThruRPG

Showing posts with label system. Show all posts
Showing posts with label system. Show all posts
Saturday, April 3, 2010

Thursday, February 11, 2010
Using TiddlyWiki - Part 2
In the last article in this series, we talked about obtaining and setting up TiddlyWiki for basic use. In this article I'm going to focus on using it effectively. I'm not going to go into vast detail here, first because TiddlyWiki isn't that complicated (though there are quite a few plugins available that add features), and second because I believe in the KISS principle. Let's start with the basics, creating content.
Adding Content
Adding content to TiddlyWiki is as simple as hitting the new tiddler link on the right sidebar and typing text. You'll probably want to read a bit about markup and tagging before you really dive in, but you don't have to. The only requirement for a tiddler is that it have a name. See how hard that was?
Basic Markup
The last article already talked about how to edit a tiddler. TiddlyWiki markup is a way to add headers, lists, text formatting, links and images to your tiddler. Here are some of the most commonly used markup elements:
Basic Text - Just type. Any text without markup is treated as plain text. The edit box automatically word wraps. Use the enter key to denote the end of a paragraph.
Headers - Headers are denoted by one or more ! characters at the beginning of a line, followed by the header text. More ! are less important headers. A typical header:
Lists - List entries begin with one or more * characters for bullet lists or one or more # characters for numbered lists. Multiple markers increase the indent level. Each list entry should start at the beginning of a line. Example:
Text formatting - Most inline text formatting is done with two marks on either side of the text receiving the formatting.
If you want to delve further into markup (and there's more available), check out the TiddlyWiki wiki, specifically the markup page.
Tags
Tags are labels you can apply to tiddlers as a means of organizing your information. With a little care they can provide very quick reference to both individual and groups of related tiddlers. Tags themselves are also tiddlers, so you can describe what the tag means in its own tiddler.
To tag a tiddler, simply place a label in the tag edit box at the bottom of the edit window. Tags can be single words or multiple words surrounded by double square brackets. My personal convention is to use all lower case letters for tags to avoid name clashes with content tiddlers.
The tags you use should fit the information you're trying to mark up. Using my recent Moria game as an example I have the following tags laid out:
Transclusion
What? Yeah it's kind of a silly word. Transclusion is including one document inside another without cut/paste. It's a great feature supported by most wikis including TiddlyWiki. Here's how to do it:
One of the best uses of this is to include stat blocks in an encounter tiddler. Simply transclude each stat block and they'll automatically be appended to the encounter text.
Organization
That pretty much covers the basics of how to use TiddlyWiki. There are a few best practices guidelines to keep in mind if you decide to use this tool.
Consistent Naming - Wikis are picky about exact names and upper and lower case. Be consistent with your naming and it'll help avoid extra work. Here are the conventions I use:
Save often and do backups - I have never experienced any problems with a TiddlyWiki, and I've used them for some pretty large projects. Prudence always wins though, and could save you a load of work if something goes wrong.
One thing, one tiddler - Keep this in mind when preparing content. Transclusion makes it easy to concatenate multiple tiddlers into a summary. It's more difficult to divide a huge mess of text into individual pieces. I generally use the following types of tiddlers:
OK, by now you're either sold or you're running screaming from the room. Hopefully the former. I hope this pair of articles has provided some insight into using TiddlyWiki for your own campaign notes. I'm happy to answer any questions that I may have left unanswered.
Adding Content
Adding content to TiddlyWiki is as simple as hitting the new tiddler link on the right sidebar and typing text. You'll probably want to read a bit about markup and tagging before you really dive in, but you don't have to. The only requirement for a tiddler is that it have a name. See how hard that was?
Basic Markup
The last article already talked about how to edit a tiddler. TiddlyWiki markup is a way to add headers, lists, text formatting, links and images to your tiddler. Here are some of the most commonly used markup elements:
Basic Text - Just type. Any text without markup is treated as plain text. The edit box automatically word wraps. Use the enter key to denote the end of a paragraph.
Headers - Headers are denoted by one or more ! characters at the beginning of a line, followed by the header text. More ! are less important headers. A typical header:
! Section 1
!! Section 1.1
!! Section 1.2
!!! Section 1.2.1
Lists - List entries begin with one or more * characters for bullet lists or one or more # characters for numbered lists. Multiple markers increase the indent level. Each list entry should start at the beginning of a line. Example:
* Bullet
** Nested bullet
** Another nested bullet
# Numbered
## Nested numbered
# Numbered again
Text formatting - Most inline text formatting is done with two marks on either side of the text receiving the formatting.
- Bold - double single-quotes around the text.
- Italic - double forward slashes around the text.
- Bold Italic - double single-quotes around double forward slashes around the text.
- Underline - double under-bar characters around the text.
- Internal link - Either the WikiWord name of the tiddler or the tiddler surrounded by double square brackets creates a link to the tiddler.
- External link - An URL will automatically be translated to a link. If you want to use text and link to a URL, you can do it with double square brackets
[[Some Text|http://rpgdump.blogspot.com]]
creates a link called Some Text pointing to my blog.
- Some Text - the optional tooltip for the image when the mouse is over it.
- Image Name - the path to the file.
If you want to delve further into markup (and there's more available), check out the TiddlyWiki wiki, specifically the markup page.
Tags
Tags are labels you can apply to tiddlers as a means of organizing your information. With a little care they can provide very quick reference to both individual and groups of related tiddlers. Tags themselves are also tiddlers, so you can describe what the tag means in its own tiddler.
To tag a tiddler, simply place a label in the tag edit box at the bottom of the edit window. Tags can be single words or multiple words surrounded by double square brackets. My personal convention is to use all lower case letters for tags to avoid name clashes with content tiddlers.
The tags you use should fit the information you're trying to mark up. Using my recent Moria game as an example I have the following tags laid out:
- Creatures - One tag per general creature type, for example: goblin, orc, troll. These tags get applied to the stat blocks and descriptive text for the creature, along with any encounters that include them or locations inhabited by them.
- Locations - One tag per broad location. For outdoor stuff, I use regions, towns or encounter locations. For dungeons, I use level names. This allows me to quickly find the relevant information for any specific locale.
- Stats - A singular tag used to mark any stat block. It's a handy way to find any specific stat block on the fly.
- Encounter - One tag per broad location. These match up to the location tags mentioned earlier, but are applied only to encounters. In Moria for example I have eregion encounter, hollin encounter, and moria encounter defined.
- Other - I have a bunch of other tags, like item to mark important or unique items, rules to mark house rules or special mechanics, and magic to mark any unique magic effects or powers I might need for reference.
 |
| Check out PBE Games on DriveThruRPG |
Transclusion
What? Yeah it's kind of a silly word. Transclusion is including one document inside another without cut/paste. It's a great feature supported by most wikis including TiddlyWiki. Here's how to do it:
<<tiddler [[Some Tiddler]]>>That's it. What this does is automatically put the contents of Some Tiddler inline in the new document. Any updates done to the transcluded tiddler are automatically updated anywhere it appears.
One of the best uses of this is to include stat blocks in an encounter tiddler. Simply transclude each stat block and they'll automatically be appended to the encounter text.
Organization
That pretty much covers the basics of how to use TiddlyWiki. There are a few best practices guidelines to keep in mind if you decide to use this tool.
Consistent Naming - Wikis are picky about exact names and upper and lower case. Be consistent with your naming and it'll help avoid extra work. Here are the conventions I use:
- Tiddlers - Capitalized as titles, always surrounded in double square brackets when referenced. This is the most readable way I've found to name tiddlers.
- Prefixes - I prefix all encounter tiddlers with Encounter: and all stat blocks with Stats:. It allows me to quickly spot these crucial elements.
- Tags - All lower case, single word if possible, but clarity of grouping is more important than using a single word.
Save often and do backups - I have never experienced any problems with a TiddlyWiki, and I've used them for some pretty large projects. Prudence always wins though, and could save you a load of work if something goes wrong.
One thing, one tiddler - Keep this in mind when preparing content. Transclusion makes it easy to concatenate multiple tiddlers into a summary. It's more difficult to divide a huge mess of text into individual pieces. I generally use the following types of tiddlers:
- Overviews - a top level summary of a major location or group.
- Locales - individual locations within a region. In dungeons these are room by room. In towns they're business by business or location by location. Outdoors I stick with natural geographic areas.
- Stat blocks - detailed information on specific creatures, spells or items, one thing per tiddler.
- Encounters - locale plus opponents (often including transcluded information). Basically everything needed to run the encounter.
OK, by now you're either sold or you're running screaming from the room. Hopefully the former. I hope this pair of articles has provided some insight into using TiddlyWiki for your own campaign notes. I'm happy to answer any questions that I may have left unanswered.
Wednesday, February 10, 2010
Using TiddlyWiki - Part 1
I've mentioned before that I use TiddlyWiki to store my campaign notes and write this blog. I thought it might be useful to write an article covering the basics of how to use it, along with some of the features I make use of in my campaign notes.
First a brief introduction. If you're not familiar with TiddlyWiki, it's essentially an implementation of a full-featured wiki in a single file. That means you can carry it around on a USB stick or email it with ease. The file contains not only the content you create, but all the tools required to edit and update that content. The exceptions to the one file structure are images and external files, which are treated as external links (more on that in a bit).
Obtaining TiddlyWiki
Getting a copy of the empty file is easy. Simply visit the download page here or here and save locally. Once you have the file downloaded you can move it around using the standard tools provided by your operating system (i.e. drag and drop or copy commands). The basic unit of information in TiddlyWiki is a tiddler, which corresponds to an article in standard wiki-speak. Each tiddler is referenced by a name either written as a WikiWord, or, if you like spaces in your titles, [[Surrounded by Double Square Brackets]]. My personal preference is to use spaces and double square brackets, but either method works.
If you're going to make use of TiddlyWiki, it's probably worth bookmarking the TiddlyWiki wiki site. There's a ton of useful information there. Here's the link: http://tiddlywiki.org/wiki/Main_Page
Startup
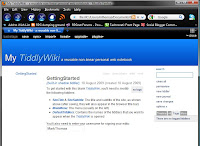
Now that you have TiddlyWiki in hand, let's do something with it.
Customize It
Let's do a bit of customization to make this TiddlyWiki ours. Once you're familiar with how things work you can set up a default TiddlyWiki with most of this stuff already done to save time. The default TiddlyWiki configuration automatically opens a tiddler called GettingStarted, and it's a good place to begin. You'll see several links in this tiddler. Note that they're in italics, indicating the content they link to isn't yet defined. These happen to be special shadow tiddlers, meaning the system has a default tiddler it uses if they're not yet defined. Let's change a few things.
 Click on SiteTitle to open the empty tiddler, then hit edit, which leaves you with the default tiddler edit window open. It has a main edit box, with a smaller edit box for tags at the bottom (see image). Replace the text with whatever you like. I'm going to use Demo Tiddler. Hit the done button in the tiddler interaction links. Congratulations, you've just edited your first tiddler.
Repeat this process for the SiteSubTitle. I'll use [[RPG dumping ground|http://rpgdump.blogspot.com/]] which is a fancy way of applying a name to a link (more on that later).
Click on the MainMenu link and edit. I'm going to set this up to provide a link to itself, to my content, and label the sections with a couple headers. Here's what I'm going to type (includes some basic markup for headers):
Click on the DefaultTiddlers link and edit. This tiddler contains a list of tiddlers that are automatically opened when you first open the TiddlyWiki file. The default content is GettingStarted, but I'm going to change this to read:
 OK, we've done some work, let's insure we save it. Click on the save changes item in the right-hand sidebar or save in the backstage bar at the top of the page. Note that your browser will likely complain bitterly about saving a file locally. I trust the TiddlyWiki site to provide a clean source file, but if you obtain one from elsewhere be careful. To save, check the remember this choice option and hit OK in the warning dialog. TiddlyWiki saved. The final result should look something like this image. The next time you open your TiddlyWiki file, it will look the same, except the empty Introduction tiddler will be open instead of GettingStarted.
The Sidebar
Before I close let me run down the sidebar options quickly. That will let me focus on content next time. Most of these are pretty straightforward, but can be confusing if you're not used to wikis. From the top:
Tabbed Window
This section of the sidebar changes dynamically as you add tiddlers to your TiddlyWiki. Here's what the tabs contain:
OK, that should do it for today. At this point you should have a ready to use TiddlyWiki configured for your own project. In the next article I'll write about:
Here's a link to part two.
First a brief introduction. If you're not familiar with TiddlyWiki, it's essentially an implementation of a full-featured wiki in a single file. That means you can carry it around on a USB stick or email it with ease. The file contains not only the content you create, but all the tools required to edit and update that content. The exceptions to the one file structure are images and external files, which are treated as external links (more on that in a bit).
Obtaining TiddlyWiki
Getting a copy of the empty file is easy. Simply visit the download page here or here and save locally. Once you have the file downloaded you can move it around using the standard tools provided by your operating system (i.e. drag and drop or copy commands). The basic unit of information in TiddlyWiki is a tiddler, which corresponds to an article in standard wiki-speak. Each tiddler is referenced by a name either written as a WikiWord, or, if you like spaces in your titles, [[Surrounded by Double Square Brackets]]. My personal preference is to use spaces and double square brackets, but either method works.
If you're going to make use of TiddlyWiki, it's probably worth bookmarking the TiddlyWiki wiki site. There's a ton of useful information there. Here's the link: http://tiddlywiki.org/wiki/Main_Page
Startup

Now that you have TiddlyWiki in hand, let's do something with it.
- Create a new folder somewhere in your documents tree, and copy the TiddlyWiki file there. A separate folder isn't necessary, but it'll help keep linked images organized (remember they're not part of the base file).
- Open the TiddlyWiki file with your web browser. This is probably as simple as double-clicking it, but you may have to use the File/Open menu in your browser. You should see something like the image here.
- Across the top is the backstage bar, tools to deal with plugins and imports. We'll ignore that for now.
- Below the backstage bar is the title area, defined by two editable tiddlers that allow you to set the name of your wiki.
- On the left is the MainMenu, an editable sidebar which you can modify to suit your needs.
- In the center is the main content area. Tiddlers you create/open show up here. Each tiddler has the following features arranged around it:
- Top right - the tiddler interaction links. These allow you to edit, close or check references on the current tiddler.
- Right side - the tags box will show any tags that apply to this tiddler. More on tags later.
- Top left - the tiddler title.
- On the right is the sidebar, providing access to basic editing and navigation features.
|
| Check out PBE Games on DriveThruRPG |
Customize It
Let's do a bit of customization to make this TiddlyWiki ours. Once you're familiar with how things work you can set up a default TiddlyWiki with most of this stuff already done to save time. The default TiddlyWiki configuration automatically opens a tiddler called GettingStarted, and it's a good place to begin. You'll see several links in this tiddler. Note that they're in italics, indicating the content they link to isn't yet defined. These happen to be special shadow tiddlers, meaning the system has a default tiddler it uses if they're not yet defined. Let's change a few things.

Repeat this process for the SiteSubTitle. I'll use [[RPG dumping ground|http://rpgdump.blogspot.com/]] which is a fancy way of applying a name to a link (more on that later).
Click on the MainMenu link and edit. I'm going to set this up to provide a link to itself, to my content, and label the sections with a couple headers. Here's what I'm going to type (includes some basic markup for headers):
!! Content
[[Introduction]]
[[The Village]]
[[The Dungeon]]
!! Tools
[[GettingStarted]]
[[MainMenu]]
Once you're happy with your edits, hit done in the tiddler interaction links. Note how the left menu has updated. You can click on any of these links to open the associated tiddlers (note that most of them are empty, ready for you to add content).
Click on the DefaultTiddlers link and edit. This tiddler contains a list of tiddlers that are automatically opened when you first open the TiddlyWiki file. The default content is GettingStarted, but I'm going to change this to read:
[[Introduction]]
Last step: Fill in your user name in the box at the bottom of the GettingStarted tiddler. It doesn't really matter if you're the only person writing in this wiki, but it does let you track changes if multiple people use it.

The Sidebar
Before I close let me run down the sidebar options quickly. That will let me focus on content next time. Most of these are pretty straightforward, but can be confusing if you're not used to wikis. From the top:
- Search - This is a simple search box that will find any text you type and automatically open the tiddlers that contain it. Note that searching on something like ''the'' in a big TiddlyWiki can take some time.
- Close All - Closes all currently open tiddlers. Basically cleanup the display. Tiddlers stay open until you close them so it's possible to have quite a few open.
- Permaview - Updates your browser URL window with a link to the currently active tiddler.
- New Tiddler - Opens a fresh tiddler in edit mode, ready for input. You can also create new tiddlers by clicking on any link that names a non-existent tiddler.
- New Journal - Journals are special tiddlers labeled with the current date and time. Useful if you're writing a diary or session log.
- Save Changes - Saves the entire TiddlyWiki.
- Options - Provides access to additional configuration options, including auto-save, backups, and search controls. There's also a link here to AdvancedOptions, which allows you to tweak even more stuff.
Tabbed Window
This section of the sidebar changes dynamically as you add tiddlers to your TiddlyWiki. Here's what the tabs contain:
- Timeline - A tiddler listing organized by last edit time, newest first. Handy for finding what you just changed.
- All - An alphabetic listing of every tiddler.
- Tags - An alphabetic listing of every tag.
- More - Several tiddler lists that might need attention:
- Missing - Tiddlers that are linked to, but don't exist.
- Orphans - Tiddlers that exist but aren't linked to.
- Shadowed - Tiddlers that have default system values, generally built-in to TiddlyWiki.
OK, that should do it for today. At this point you should have a ready to use TiddlyWiki configured for your own project. In the next article I'll write about:
- Basic markup - How to do headers, formatted text, lists and links.
- Tags - How to organize tiddlers with the built in tag system.
- Transclusion - A handy way to include one tiddler within another.
- Organization - Some thoughts on organizing your notes.
Here's a link to part two.
Thursday, January 28, 2010
Return to Moria: Experience
There have been a few recent blog posts concerning experience points in the campaign recently, this one from Jeff's Gameblog, and this and this from The Tao of D&D. Here's how I'm handling experience in Moria.
XP for Treasure
I'm using 1 XP = 1 GP for treasure recovered from the dungeon. There are some pretty nice stacks of coin hidden away in the Mines, almost all of it protected by something mean and nasty. I figure Moria has been empty for a long time, so any wealth, unless it was very well protected, has long since been redistributed. XP for treasure is handed out only after it's safely returned to civilization, in this case the town of Hollin. This might sound a bit arbitrary, but it makes for some interesting choices for the players. Who goes back to town, what do you do with the treasure once it's there, and who stays behind to guard it suddenly become tough questions.
XP for Killing Things
For monster-slaying I use a version of the 1st Edition D&D experience value calculations. For this game I'm awarding accelerated experience so the numbers have been tweaked up a bit. I don't do adjustments for individual hit points; to be honest I don't really do individual HP in most cases. I have a cheat sheet listing each creature's XP value and a simple spreadsheet to plug in numbers killed for a quick total calculation. I have my laptop at the table (since all my notes are in TiddlyWiki). It takes about ten seconds to plug in kills and come up with an XP total. Kill XP is awarded at the end of combat and is split by everyone involved in the fight. On the low end sub 1-HD creatures are worth maybe 20 XP, on the upper end, well there's a unique creature in Moria that's worth about 12,000 XP right now.
XP for Completing Encounters
I give an XP bonus for completing encounters during the course of play. Completing might mean killing all the goblins, but it could also mean negotiating passage through their stronghold or getting them involved in a conflict with the neighboring trolls so the party can slip in and loot their camp. I base this on the potential threat and hostility of the encounter. This XP is sort of a "discretionary fund" and I'll admit to using it as a reward for play that I find entertaining (the GM is there to have fun too!) This XP is awarded on the spot, and is split between everyone who helped complete the encounter, so all characters involved in a multi-attack plan, for example, would receive a share.
The relative amounts of the three types of experience are weighed toward loot, then kills, then encounters. Loot first, because it allows clever play to bypass risk for immediate gain. Kills, because my players like combat, and encounters, because hey, I have needs too. I've used this system in the past and it's worked well. It probably sounds more complex than it is.
It's likely any responses to this post will be delayed, since I'm actually driving from Indiana to Virginia today for this game.
XP for Treasure
I'm using 1 XP = 1 GP for treasure recovered from the dungeon. There are some pretty nice stacks of coin hidden away in the Mines, almost all of it protected by something mean and nasty. I figure Moria has been empty for a long time, so any wealth, unless it was very well protected, has long since been redistributed. XP for treasure is handed out only after it's safely returned to civilization, in this case the town of Hollin. This might sound a bit arbitrary, but it makes for some interesting choices for the players. Who goes back to town, what do you do with the treasure once it's there, and who stays behind to guard it suddenly become tough questions.
XP for Killing Things
For monster-slaying I use a version of the 1st Edition D&D experience value calculations. For this game I'm awarding accelerated experience so the numbers have been tweaked up a bit. I don't do adjustments for individual hit points; to be honest I don't really do individual HP in most cases. I have a cheat sheet listing each creature's XP value and a simple spreadsheet to plug in numbers killed for a quick total calculation. I have my laptop at the table (since all my notes are in TiddlyWiki). It takes about ten seconds to plug in kills and come up with an XP total. Kill XP is awarded at the end of combat and is split by everyone involved in the fight. On the low end sub 1-HD creatures are worth maybe 20 XP, on the upper end, well there's a unique creature in Moria that's worth about 12,000 XP right now.
XP for Completing Encounters
I give an XP bonus for completing encounters during the course of play. Completing might mean killing all the goblins, but it could also mean negotiating passage through their stronghold or getting them involved in a conflict with the neighboring trolls so the party can slip in and loot their camp. I base this on the potential threat and hostility of the encounter. This XP is sort of a "discretionary fund" and I'll admit to using it as a reward for play that I find entertaining (the GM is there to have fun too!) This XP is awarded on the spot, and is split between everyone who helped complete the encounter, so all characters involved in a multi-attack plan, for example, would receive a share.
The relative amounts of the three types of experience are weighed toward loot, then kills, then encounters. Loot first, because it allows clever play to bypass risk for immediate gain. Kills, because my players like combat, and encounters, because hey, I have needs too. I've used this system in the past and it's worked well. It probably sounds more complex than it is.
It's likely any responses to this post will be delayed, since I'm actually driving from Indiana to Virginia today for this game.
Tuesday, January 26, 2010
Return to Moria: House Rules
My Return to Moria game is hewing pretty closely to 1st Edition AD&D rules, but we're adding a number of house rules to add our own flavor to the game. Here they are:
Attribute Checks
Certain situations call for the use of a specific character attribute. We've always used a 'd20 roll under' system for attribute checks in our games. This time I'm flipping it and using an attribute + d20 roll. This allows me to keep my notes a bit neater, flips a roll under mechanic to a roll over, and doesn't really change the results.
THAC0
We're using 2nd edition THAC0 rules. Everyone at the table is familiar with it and it saves me some table searching.
Critical Hits and Fumbles
Any natural one rolled is a fumble and will be rolled on the fumble results table. Any natural roll of 20 is rerolled, and if the second roll hits, the result will be rolled on the critical hits table. We use a second roll to increase the difficulty of critical hits due to the rather unpleasant nature of our house critical table, which divides result by damage type. An example result (roll of 84):
Hero Points
Each player (not character) gets a number of tokens at the beginning of the game, and at various points during the game (typically after an encounter completed). These tokens can be spent to achieve specific results in game. One token spent grants:
Hit Points and Death
Characters are fully effective until they reach zero hit points, which renders them unconscious. Characters are slain if their hit points drop to negative constitution. Characters regain consciousness whenever their hit points rise above zero.
Spell Books
Spell books are unique artifacts, created by each magic user to house their encoded understanding of magical spells. They are generally high quality books with dozens of pages and can hold up to 30 spell inscriptions. Spell books are somewhat large and bulky (think encyclopedia volume), and magic users should pack light to allow their spell book to fit into their 'backpack' encumbrance.
Each magic user must decide if they are going to risk their spell book in the dungeon. Spell books are subject to damage, which might cause irreplaceable loss of spells. Specifically if the player suffers an elemental attack and fails their saving throw the spell book will be tested for damage. Swimming (or drowning) might also cause damage. Spell books might be stolen or taken by intelligent foes. The flip side is a magic user cannot recover any spells without their spell book. Note that magic users may attempt to copy a spell from another magic user's spell book, but they cannot memorize a spell directly from its pages (no sharing spell books for memorization).
A new, blank spell book costs 500 GP in materials and takes a week of constant work and ritual to properly prepare.
Spell Copying
Spell copying allows magic users to share or exchange spells, or learn new spells from arcane sources (scrolls typically).
Since I'm not forcing the 100 gp gem material component, here's how Identify works:
So there you have it, our house rules. I'm probably missing something in this list, but it should be pretty complete. Nothing too bizarre or unusual (or at least I don't think so), but maybe some of you have different opinions.
On a final related, but different note, a quick print preview with all tiddlers open in my Return to Moria working file shows I have about 275 pages of campaign material written. Over preparation for the win (again). One day I'll learn to either prep less material or leave out some details.
Attribute Checks
Certain situations call for the use of a specific character attribute. We've always used a 'd20 roll under' system for attribute checks in our games. This time I'm flipping it and using an attribute + d20 roll. This allows me to keep my notes a bit neater, flips a roll under mechanic to a roll over, and doesn't really change the results.
THAC0
We're using 2nd edition THAC0 rules. Everyone at the table is familiar with it and it saves me some table searching.
Critical Hits and Fumbles
Any natural one rolled is a fumble and will be rolled on the fumble results table. Any natural roll of 20 is rerolled, and if the second roll hits, the result will be rolled on the critical hits table. We use a second roll to increase the difficulty of critical hits due to the rather unpleasant nature of our house critical table, which divides result by damage type. An example result (roll of 84):
- Slash - large slab of meat carved from leg, 3x damage, half movement, roll DEX or fall for 1d3 rounds
- Crush - masterful display results in normal damage, but dazzles target, they lose 1 round
- Pierce - weapon pierces and entangles guts, normal damage, subsequent attacks do additional 1d4 yanking damage
Hero Points
Each player (not character) gets a number of tokens at the beginning of the game, and at various points during the game (typically after an encounter completed). These tokens can be spent to achieve specific results in game. One token spent grants:
- +1 (+5%) to a single die roll (to hit, damage, or save for example) The cost of affecting any single die roll doubles beyond 1st: +2 costs two, +3 costs four, +4 costs eight, etc.
- Force an opponent to re-roll a single die roll (to hit, damage, save, etc.)
- Exchange for 100 XP / level of the character gaining the XP.
- A free use of a charged or use per day magic item (does not include potions, scrolls, or other consumable items).
- Gain a free non-combat action in a combat round.
Hit Points and Death
Characters are fully effective until they reach zero hit points, which renders them unconscious. Characters are slain if their hit points drop to negative constitution. Characters regain consciousness whenever their hit points rise above zero.
Spell Books
Spell books are unique artifacts, created by each magic user to house their encoded understanding of magical spells. They are generally high quality books with dozens of pages and can hold up to 30 spell inscriptions. Spell books are somewhat large and bulky (think encyclopedia volume), and magic users should pack light to allow their spell book to fit into their 'backpack' encumbrance.
Each magic user must decide if they are going to risk their spell book in the dungeon. Spell books are subject to damage, which might cause irreplaceable loss of spells. Specifically if the player suffers an elemental attack and fails their saving throw the spell book will be tested for damage. Swimming (or drowning) might also cause damage. Spell books might be stolen or taken by intelligent foes. The flip side is a magic user cannot recover any spells without their spell book. Note that magic users may attempt to copy a spell from another magic user's spell book, but they cannot memorize a spell directly from its pages (no sharing spell books for memorization).
A new, blank spell book costs 500 GP in materials and takes a week of constant work and ritual to properly prepare.
Spell Copying
Spell copying allows magic users to share or exchange spells, or learn new spells from arcane sources (scrolls typically).
- One attempt is allowed per day.
- Scrolls are destroyed by a copy attempt, successful or not. Spellbooks are not.
- Each attempt takes one hour per spell level.
- Each spell can be attempted once per character level, no matter the source.
- Chance to know (INT based from PHB) determines copy success.
- Attempting to copy a spell you can't cast yet suffers a penalty of 5% / level difference (required level to use vs. caster level).
Since I'm not forcing the 100 gp gem material component, here's how Identify works:
- It can only be cast on an item once per day.
- When cast there is a INT x 5% chance of revealing one characteristic of the item.
- Having an appropriate LORE adds 15% to the chance of revealing a characteristic.
- The caster suffers any potential ill effects from an item when casting this spell.
- Normal 'try it and see' methods can be used as well.
So there you have it, our house rules. I'm probably missing something in this list, but it should be pretty complete. Nothing too bizarre or unusual (or at least I don't think so), but maybe some of you have different opinions.
On a final related, but different note, a quick print preview with all tiddlers open in my Return to Moria working file shows I have about 275 pages of campaign material written. Over preparation for the win (again). One day I'll learn to either prep less material or leave out some details.
Monday, January 18, 2010
The Weird Stuff I Find
I was cleaning up my RPG folder on my computer this week, a never ending process, and stumbled across this text file dating from 1997. It appears to be some sort of classless advancement system for AD&D 2nd edition, but I have no memory of writing it. It also appears to be implementing spell use based on a point system. It looks a bit incomplete too (some of the XP costs near the end are a bit sketchy too). Look familiar to anyone?
Advancement
The follow rules are applied to advancement:
Each player specifies their top 5 priorities for advancement. Experience is divided according to the following breakdown:
Measure physical toughness and ability to avoid damage. All characters use d8 for hit points. Each begins with 8 hit points modified by constitution. Each additional die costs : 1500 EXP
THAC0
The chance to hit as rolled on a d20. Characters all begin with a THAC0 of 20. Each 1 point of THAC0 improvement costs: 1500 EXP
Magic Power
The development of raw energies of magic. Each point of magic power corresponds to one point of magic power. Each point of magic power costs: 750 EXP
Magic Channel
The power to channel greater energies. Each point of magic channel allows another level of spell to be cast without penalty. Each point of magic channel costs: 1500 EXP
God Power
Like magic power, only for divine power. Each point of god power costs: 500 EXP
God Channel
Like magic channel, but for divine power. Each point of god channel costs: 1000 EXP
Minor Ability
Each costs: 100 EXP
Major Ability
Each costs: 150 EXP
Minor Level Related Ability
Each costs: 75 EXP per level of ability
Major Level Related Ability
Each costs: 75 EXP per level of ability
Minor Penalty
Each gives back: -75 EXP
Major Penalty
Each gives back: -100 EXP
Thief Skills
Each costs:
Non-Weapon Proficiencies
Each costs:
Weapons Proficiencies
Improves character abilities with a weapon of choice. Each costs: 150 EXP
Multiple Attacks
The ability to attack more than once per round. Each costs: 1500 EXP
Advancement
The follow rules are applied to advancement:
Each player specifies their top 5 priorities for advancement. Experience is divided according to the following breakdown:
- 40%
- 25%
- 15%
- 10%
- 10%
Measure physical toughness and ability to avoid damage. All characters use d8 for hit points. Each begins with 8 hit points modified by constitution. Each additional die costs : 1500 EXP
THAC0
The chance to hit as rolled on a d20. Characters all begin with a THAC0 of 20. Each 1 point of THAC0 improvement costs: 1500 EXP
Magic Power
The development of raw energies of magic. Each point of magic power corresponds to one point of magic power. Each point of magic power costs: 750 EXP
Magic Channel
The power to channel greater energies. Each point of magic channel allows another level of spell to be cast without penalty. Each point of magic channel costs: 1500 EXP
God Power
Like magic power, only for divine power. Each point of god power costs: 500 EXP
God Channel
Like magic channel, but for divine power. Each point of god channel costs: 1000 EXP
Minor Ability
Each costs: 100 EXP
Major Ability
Each costs: 150 EXP
Minor Level Related Ability
Each costs: 75 EXP per level of ability
Major Level Related Ability
Each costs: 75 EXP per level of ability
Minor Penalty
Each gives back: -75 EXP
Major Penalty
Each gives back: -100 EXP
Thief Skills
Each costs:
| Percent | Cost |
|---|---|
| 1-50 | 5 EXP per |
| 51-75 | 7 EXP per |
| 76-90 | 10 EXP per |
| 91-99 | 15 EXP per |
Non-Weapon Proficiencies
Each costs:
| Percent | Cost |
|---|---|
| 1-50 | 3 EXP per |
| 51-75 | 5 EXP per |
| 76-90 | 7 EXP per |
| 91-99 | 10 EXP per |
Weapons Proficiencies
Improves character abilities with a weapon of choice. Each costs: 150 EXP
| Proficiency | Bonus |
|---|---|
| 0 | -3 THAC0 |
| 1 | -1 THAC0 |
| 2 | 0 THAC0 |
| 3 | 0 THAC0 |
| 4 | +1 THAC0 |
| 5 | +1 THAC0 |
| 6 | +2 THAC0,+1 DAM |
Multiple Attacks
The ability to attack more than once per round. Each costs: 1500 EXP
Tuesday, September 29, 2009
Events from Life: Your local newspaper
Need some rumors and color for you campaign's village or town? The answer may be as close as your local newspaper (or their web site if you don't subscribe). The idea is pretty simple really. Scan the local headlines and community events calendar for ideas, twist to fit your campaign setting, and write yourself a short note. If your local paper does provide the inspiration you desire, check out the web and look for a locale that's a better match.
One of the nice features of this technique is it provides a never-ending source of rumors and local color, and things tend to hold together pretty well over time. Here's a list of thirteen events I adopted from my local newspaper over the last couple weeks:
One of the nice features of this technique is it provides a never-ending source of rumors and local color, and things tend to hold together pretty well over time. Here's a list of thirteen events I adopted from my local newspaper over the last couple weeks:
- A runaway wagon crashes into the market, one of the vendors is trampled to death by the horses.
- A man is found drowned in his neighbor's pond. The constable suspects foul play, but has no suspects.
- A herd of cattle stampedes through a local hamlet. No one is injured but the owner is forced to pay property damages.
- Heavy rains flood the local river, forcing dozens to abandon their riverfront homes. The displaced are housed at a local church. The baron condemns many of the properties and forces the refugees to move.
- A suspicious barn fire inspires a barn raising. The constable suspects arson (and subsequently arrests a drifter).
- A bridge or ford is being rebuilt or improved.
- The annual spring boat race down the river draws a larger than usual crowd of spectators.
- The baron is nearly crippled by a hard fall from his horse while out hunting. Discord ensues while he recovers from his wounds.
- The Autumn apple harvest brings the usual gang of migrant laborers to the area. Locals are on the watch for suspicious activities.
- A local farmer is convicted of stealing and killing his neighbor's geese.
- A woman is stabbed to death by her drunken accuser while arguing her case before a magistrate.
- A new road is being built or an old one improved.
- A balcony collapses at local inn / tavern, with multiple injuries. The structure is condemned by the magistrate as a hazard.
Friday, August 21, 2009
Random Tables
When I'm building encounters, dungeons or NPC groups there's often a need to fill the pockets of minor creatures or characters with a bit of gear and loot. Now it's pretty easy to give out some basic coin or other valuables, but what if you want to add in some special items? An extra gem, a nice piece of jewelry, or even a bit of magic? One of the ways I do this, particularly if I'm designing large groups, is with a random table.
Now some people have problems with using tables for treasure, but I'm not one of them. I don't use them to hand out important items, but for a bit of color, they work quite well. Here's my standard random treasure table, used with percentile dice:
* Singular item, cross off once used, treat subsequent rolls as Nothing special.
Note that each entry in the table is roughly half as likely as the previous, and the most common results are a bit of extra coin or a sparkly, so you're not really giving away anything spectacular using this method. It's also easy to adjust the entries to add more special results. The same table layout works well for random encounters outdoors:
In fact this table works well for almost anything in a sandbox-style game when you haven't prepared material to cover something the player's are trying to do (especially in a system without skills to cover every contingency). The table can be generalized to:
So there you have it, random tables that aren't completely random. Hope they're useful to someone out there!
Now some people have problems with using tables for treasure, but I'm not one of them. I don't use them to hand out important items, but for a bit of color, they work quite well. Here's my standard random treasure table, used with percentile dice:
01-50 Nothing special
51-75 Double normal coins
76-90 Decent gem or jewelry
91-95 Potion, scroll or other one-shot magic
96 Minor magic item *
97 Valuable gem or jewelry *
98 Valuable information (map, key or document) *
99 Very valuable gem or jewelry *
00 Good magic item *
* Singular item, cross off once used, treat subsequent rolls as Nothing special.
Note that each entry in the table is roughly half as likely as the previous, and the most common results are a bit of extra coin or a sparkly, so you're not really giving away anything spectacular using this method. It's also easy to adjust the entries to add more special results. The same table layout works well for random encounters outdoors:
01-50 Nothing special
51-75 Harmless encounter (wild beast, minor obstacle)
76-90 Minor nuisance (predatory beast, significant obstacle)
91-95 Major encounter
96 Unique creature *
97 Unique creature *
98 Unique obstacle *
99 Unique obstacle *
00 Hidden location *
In fact this table works well for almost anything in a sandbox-style game when you haven't prepared material to cover something the player's are trying to do (especially in a system without skills to cover every contingency). The table can be generalized to:
01-50 Nothing special
51-75 Minor result
76-90 Medium result
91-95 Major result
96 Unique result *
97 Unique result *
98 Unique result *
99 Unique result *
00 Unique result *
So there you have it, random tables that aren't completely random. Hope they're useful to someone out there!
Monday, April 6, 2009
Grim Monday: Critical Fumble!
A lot of people talk about what it was like to game in the old days. These two tables come straight out of my gaming roots, reflecting some of the deadly nature our game sessions used to have. We first started using these tables in the early 80s. Our best guess as to their origin is "some guy at Virginia Tech made them." The originals are typewritten (yes, with a real typewriter) and have nearly disintegrated from use. I created electronic copies and cleaned up some of the typos in the originals, but the results are about the same. Death and mayhem.
We used these with all flavors of D&D (primarily 1st edition back then). Our house rules were that a one was a fumble and a 20 was a critical on any to hit roll. Both characters and their foes were subject to the whim of charts, allowing even the lowliest kobold to pose a significant threat to the party. So without further ado, here they are:
We used these with all flavors of D&D (primarily 1st edition back then). Our house rules were that a one was a fumble and a 20 was a critical on any to hit roll. Both characters and their foes were subject to the whim of charts, allowing even the lowliest kobold to pose a significant threat to the party. So without further ado, here they are:
Saturday, January 17, 2009
Random Thoughts - TiddlyWiki
Saturdays I get to take a break from items and encounters and just write something RPG related. Today I'm going to write about TiddlyWiki. Many people are familiar with the wiki concept, if you're not, take a look at the definition on Wikipedia. TiddlyWiki is a single HTML document that implements a wiki. Wiki articles are called Tiddlers, and each Tiddler can be linked, tagged or edited just like in a regular wiki.
I've been using TiddlyWiki to write up my campaign notes for an upcoming game. It's proven to be an incredibly easy to use tool for organizing the labyrinth-like structure my notes usually take. With a bit of forethought and some self-discipline on tagging Tiddlers I now have a fully hyper-linked document containing all my campaign notes, maps and character sheets. I'm also using it as a staging ground for this blog and as a personal "To Do" list.
I'd urge anyone who is interested in writing or information organization to give TiddlyWiki a look. It's dead-easy to use, all you need is a web browser and a copy of the free TiddlyWiki starter file. Figuring out the basics takes about ten minutes of playing around. This software is well worth a look, enjoy!
I've been using TiddlyWiki to write up my campaign notes for an upcoming game. It's proven to be an incredibly easy to use tool for organizing the labyrinth-like structure my notes usually take. With a bit of forethought and some self-discipline on tagging Tiddlers I now have a fully hyper-linked document containing all my campaign notes, maps and character sheets. I'm also using it as a staging ground for this blog and as a personal "To Do" list.
I'd urge anyone who is interested in writing or information organization to give TiddlyWiki a look. It's dead-easy to use, all you need is a web browser and a copy of the free TiddlyWiki starter file. Figuring out the basics takes about ten minutes of playing around. This software is well worth a look, enjoy!
Wednesday, January 7, 2009
Ancestral Items
Ancestral items are a concept I introduced into one of my campaigns. They provide a means of introducing magical items tailored to a specific character in a consistent way. They can also provide story hooks based on the history of the item and its former owners. In the original campaign mithril was a an extremely rare and valuable substance, providing a needed limit on the availability of ancestral items. Feel free to substitute another material suitable to your own game.
Mithril has many unique properties of interest to the mage. One such property is the ability to capture the essence of a bloodline in a magical construct, forever tying it to a specific person and their descendants.
At its initial forging an ancestral item is unremarkable except for its unique tie to a specific person, though additional magical properties can be imbued into it when created. Over time the item absorbs the spiritual energies of its owner, binding them into its own enchantment. The absorption process is not harmful, though it does strengthen the bond between the pair. The owner may feel uncomfortable without the item nearby, and a sentient item may use its powers to return to its rightful place.
As the item absorbs energy from its owner it gains powers and abilities suited to the owner's nature. The type and number of powers gained is subject to GM discretion. As a guideline, add one minor power or enhance an existing power every five or six game sessions. Powers gained should reflect both the nature of the item and the nature of the bearer.
Ancestral items can be dangerous to their owners, as items with long history and great power can control a weak-willed bearer. In these cases the bearer may find themselves mimicking the behavior of a long-dead ancestor or carrying out deeds they would ordinarily find distasteful.
Ancestral items radiate a magical aura, but behave as normal items in the hands of one not of the proper bloodline. They may even feel off balance, distasteful, or slippery in the wrong hands. Attempts to discern an ancestral item's nature by magical means will reveal its bloodline, Great enchantment magic, plus any mundane enchantment initially placed on the item.
Creation
Very few possess the knowledge required to create an ancestral item, as it involves magical effort, skilled crafting, and proper materials. The process of creating an ancestral item takes weeks and costs thousands of coin in time and materials. The mithril required to create even a small ancestral item would cost 2000 or more coins if it could be found at all. The following outline summarizes the skills and steps required to make a basic ancestral item.
Gather materials - The divination at this stage determines the exact items required to correctly link the item to the appropriate bloodline. A failed divination might reveal incorrect items or materials. All materials should reflect the nature of the owner. Extra materials and items might be prudent.
Imbue the item - Prepare the mithril for use and imbue it into the item. The purification process can be repeated if it fails, the imbue test destroys the item if it fails.
Association with the bloodline - Tie the item to the owner. Failing either test in this stage requires the entire stage be repeated.
Destruction
Ancestral items are, for the most part, indestructible. Their parts can be separated with a Superb test of crafting. Destroying the parts and their intrinsic magic is nearly impossible, requiring an Epic test of enchantment magic. If the parts of an ancestral item are scattered, any one part can be used to lead to the others with a Good test of divination magic.
Mithril has many unique properties of interest to the mage. One such property is the ability to capture the essence of a bloodline in a magical construct, forever tying it to a specific person and their descendants.
At its initial forging an ancestral item is unremarkable except for its unique tie to a specific person, though additional magical properties can be imbued into it when created. Over time the item absorbs the spiritual energies of its owner, binding them into its own enchantment. The absorption process is not harmful, though it does strengthen the bond between the pair. The owner may feel uncomfortable without the item nearby, and a sentient item may use its powers to return to its rightful place.
As the item absorbs energy from its owner it gains powers and abilities suited to the owner's nature. The type and number of powers gained is subject to GM discretion. As a guideline, add one minor power or enhance an existing power every five or six game sessions. Powers gained should reflect both the nature of the item and the nature of the bearer.
Ancestral items can be dangerous to their owners, as items with long history and great power can control a weak-willed bearer. In these cases the bearer may find themselves mimicking the behavior of a long-dead ancestor or carrying out deeds they would ordinarily find distasteful.
Ancestral items radiate a magical aura, but behave as normal items in the hands of one not of the proper bloodline. They may even feel off balance, distasteful, or slippery in the wrong hands. Attempts to discern an ancestral item's nature by magical means will reveal its bloodline, Great enchantment magic, plus any mundane enchantment initially placed on the item.
Creation
Very few possess the knowledge required to create an ancestral item, as it involves magical effort, skilled crafting, and proper materials. The process of creating an ancestral item takes weeks and costs thousands of coin in time and materials. The mithril required to create even a small ancestral item would cost 2000 or more coins if it could be found at all. The following outline summarizes the skills and steps required to make a basic ancestral item.
Gather materials - The divination at this stage determines the exact items required to correctly link the item to the appropriate bloodline. A failed divination might reveal incorrect items or materials. All materials should reflect the nature of the owner. Extra materials and items might be prudent.
- Great test of divining magic to determine appropriate materials
- Raw materials - Materials suitable for the basic item construction, at least Great quality
- Special ingredients - At least 3 unique Superb quality ingredients
- Mithril - Sufficient quantity to infuse the entire item
- Great test of enchantment magic to design the pattern or template
- Good test of crafting to create the basic item using the raw materials
- Great test of crafting to place the special ingredients in the basic item
Imbue the item - Prepare the mithril for use and imbue it into the item. The purification process can be repeated if it fails, the imbue test destroys the item if it fails.
- Superb test of enchantment magic to purify the mithril
- Superb test of crafting to imbue the item with mithril
Association with the bloodline - Tie the item to the owner. Failing either test in this stage requires the entire stage be repeated.
- A blood sacrifice from the owner
- Great test of enchantment magic to link the item
- Great test of willpower by the owner to accept the enchantment
Destruction
Ancestral items are, for the most part, indestructible. Their parts can be separated with a Superb test of crafting. Destroying the parts and their intrinsic magic is nearly impossible, requiring an Epic test of enchantment magic. If the parts of an ancestral item are scattered, any one part can be used to lead to the others with a Good test of divination magic.
Subscribe to:
Posts (Atom)